Shippp MCP
Connect a client
Step-by-step setup for Claude, Claude Code, Cursor, VS Code, Codex, Replit and others.
Connecting takes a minute and you only do it once per client. No API key, terminal setup or config file is needed — sign-in and access approval start from the client.
Before you start
Have a Shippp account and a workspace
If you are new, create one at app.shippp.ai. You need an editor seat — viewers can't use MCP.Copy the Shippp MCP URL
Shippp MCP URL
https://app.shippp.ai/api/mcp/mcp
Shortcut from inside Shippp
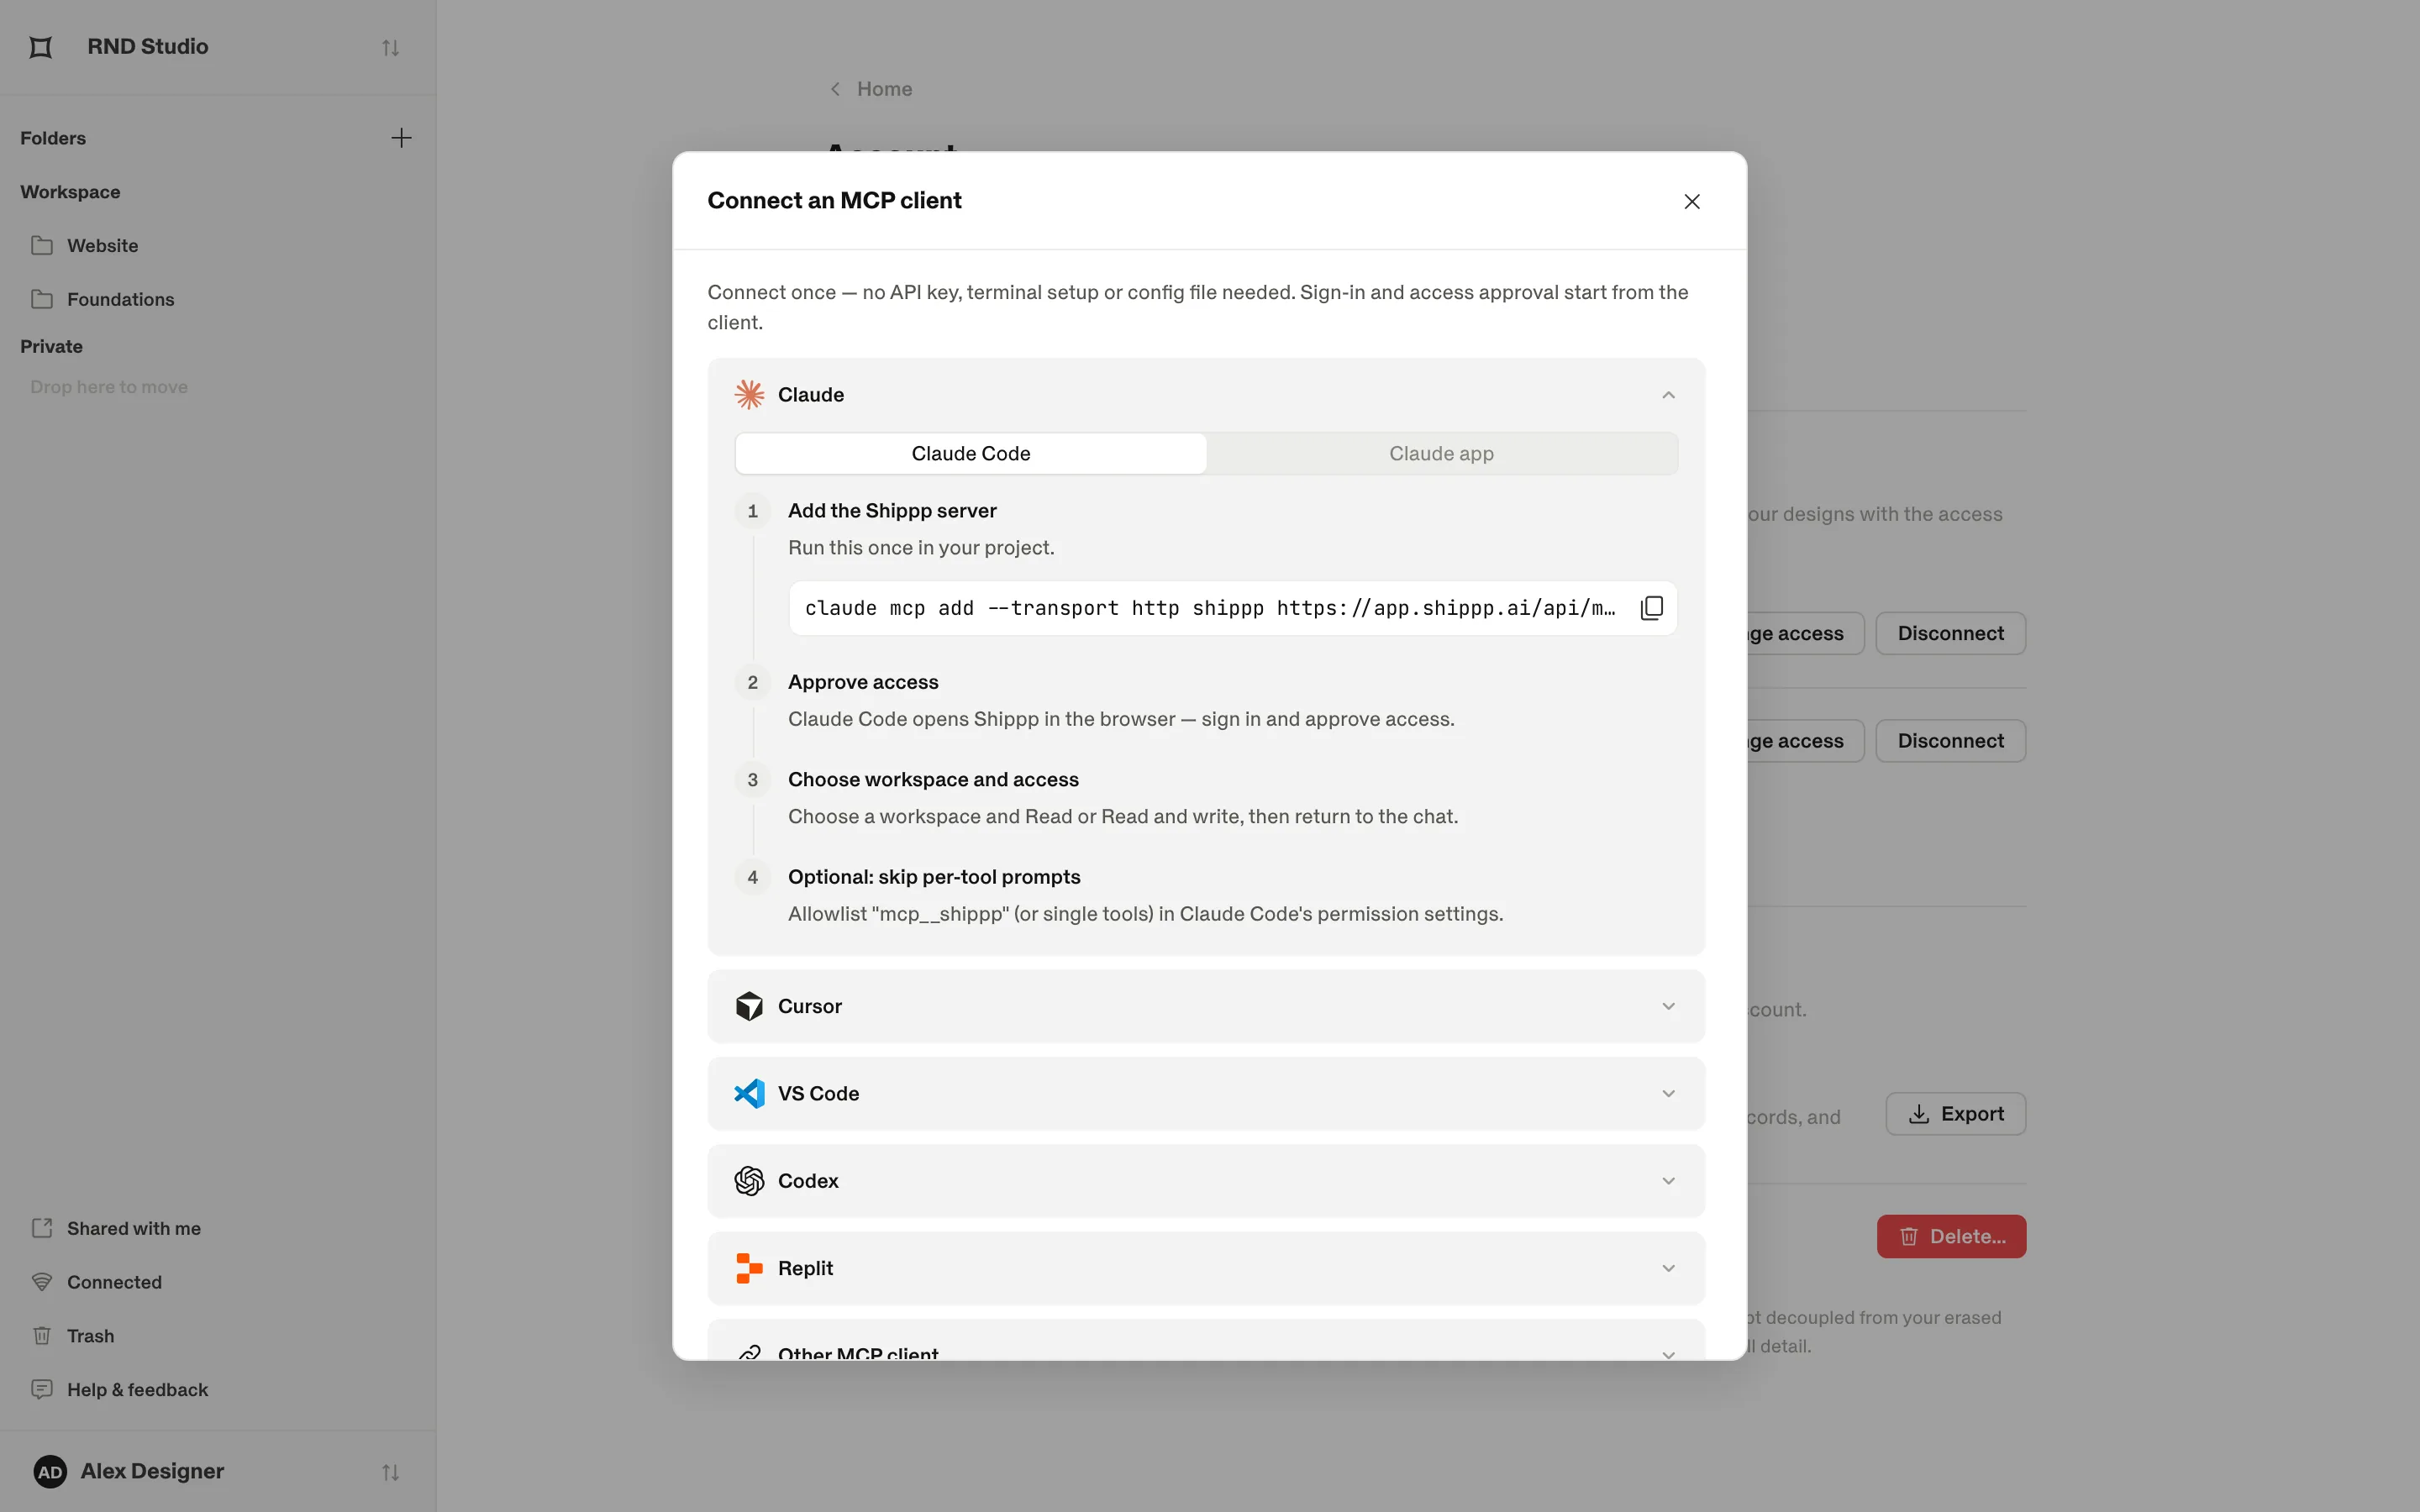
Set up your client
Claude app (claude.ai and desktop)
Open connector settings
In Claude, open Settings → Connectors and choose Add custom connector. On a Team or Enterprise plan, connectors live under Organization settings → Connectors and are added by an admin.Open Claude connector settings
Paste the Shippp URL
Name it Shippp and paste the URL. Claude detects the sign-in settings from it.https://app.shippp.ai/api/mcp/mcpSign in and choose access
Sign in to Shippp, pick a workspace and choose Read or Read and write.Allow tools
Each tool asks once on first use. Choose Allow always to stop repeat prompts.
Claude Code
Add the Shippp server
Run this once in your project folder:Terminal
claude mcp add --transport http shippp https://app.shippp.ai/api/mcp/mcpApprove access
Claude Code opens Shippp in the browser (run/mcpin Claude Code if it doesn't). Sign in and approve access.Choose workspace and access
Pick the workspace, then Read or Read and write, and click Allow access. Return to the chat.Optional: skip per-tool prompts
Allowlistmcp__shippp(or single tools) in Claude Code's permission settings.
Cursor
Install Shippp
Use the Install in Cursor button in Shippp's connect dialog, or add the URL under Settings → MCP:~/.cursor/mcp.json
{
  "mcpServers": {
    "shippp": { "url": "https://app.shippp.ai/api/mcp/mcp" }
  }
}
Approve access
Cursor opens the Shippp sign-in — approve access.Choose workspace and access
Pick the workspace, then Read or Read and write, and click Allow access. Return to the chat.
VS Code
Install Shippp
Use the Install in VS Code button in Shippp's connect dialog, or run the MCP: Add Server command, choose HTTP and paste the URL.https://app.shippp.ai/api/mcp/mcpApprove access
VS Code opens the Shippp sign-in — approve access.Choose workspace and access
Pick the workspace, then Read or Read and write, and click Allow access. Return to the chat.
Codex
Add the Shippp server
In Codex's MCP settings, add the Shippp server with this URL (HTTP transport):https://app.shippp.ai/api/mcp/mcpApprove access
Sign in to Shippp when prompted and approve access.Choose workspace and access
Pick the workspace, then Read or Read and write, and click Allow access. Return to the chat.
Replit
Add Shippp to Replit
Use the Add to Replit button in Shippp's connect dialog, or in Integrations → MCP Servers choose Add MCP server, name it Shippp and paste the URL.https://app.shippp.ai/api/mcp/mcpApprove access
Replit walks you through the Shippp sign-in on Test & save — approve access.Choose workspace and access
Pick the workspace, then Read or Read and write, and click Allow access. Return to the chat.
Any other MCP client
Add the Shippp server
In your client's MCP or connector settings, add this URL as a remote (HTTP) server:https://app.shippp.ai/api/mcp/mcpApprove access
Sign in to Shippp when prompted and approve access.Choose workspace and access
Pick the workspace, then Read or Read and write, and click Allow access. Return to the chat.
The approval screen
Whichever client you use, you finish on Shippp's Authorize access screen. It tells you which workspace the client will reach and lets you choose the level of access.
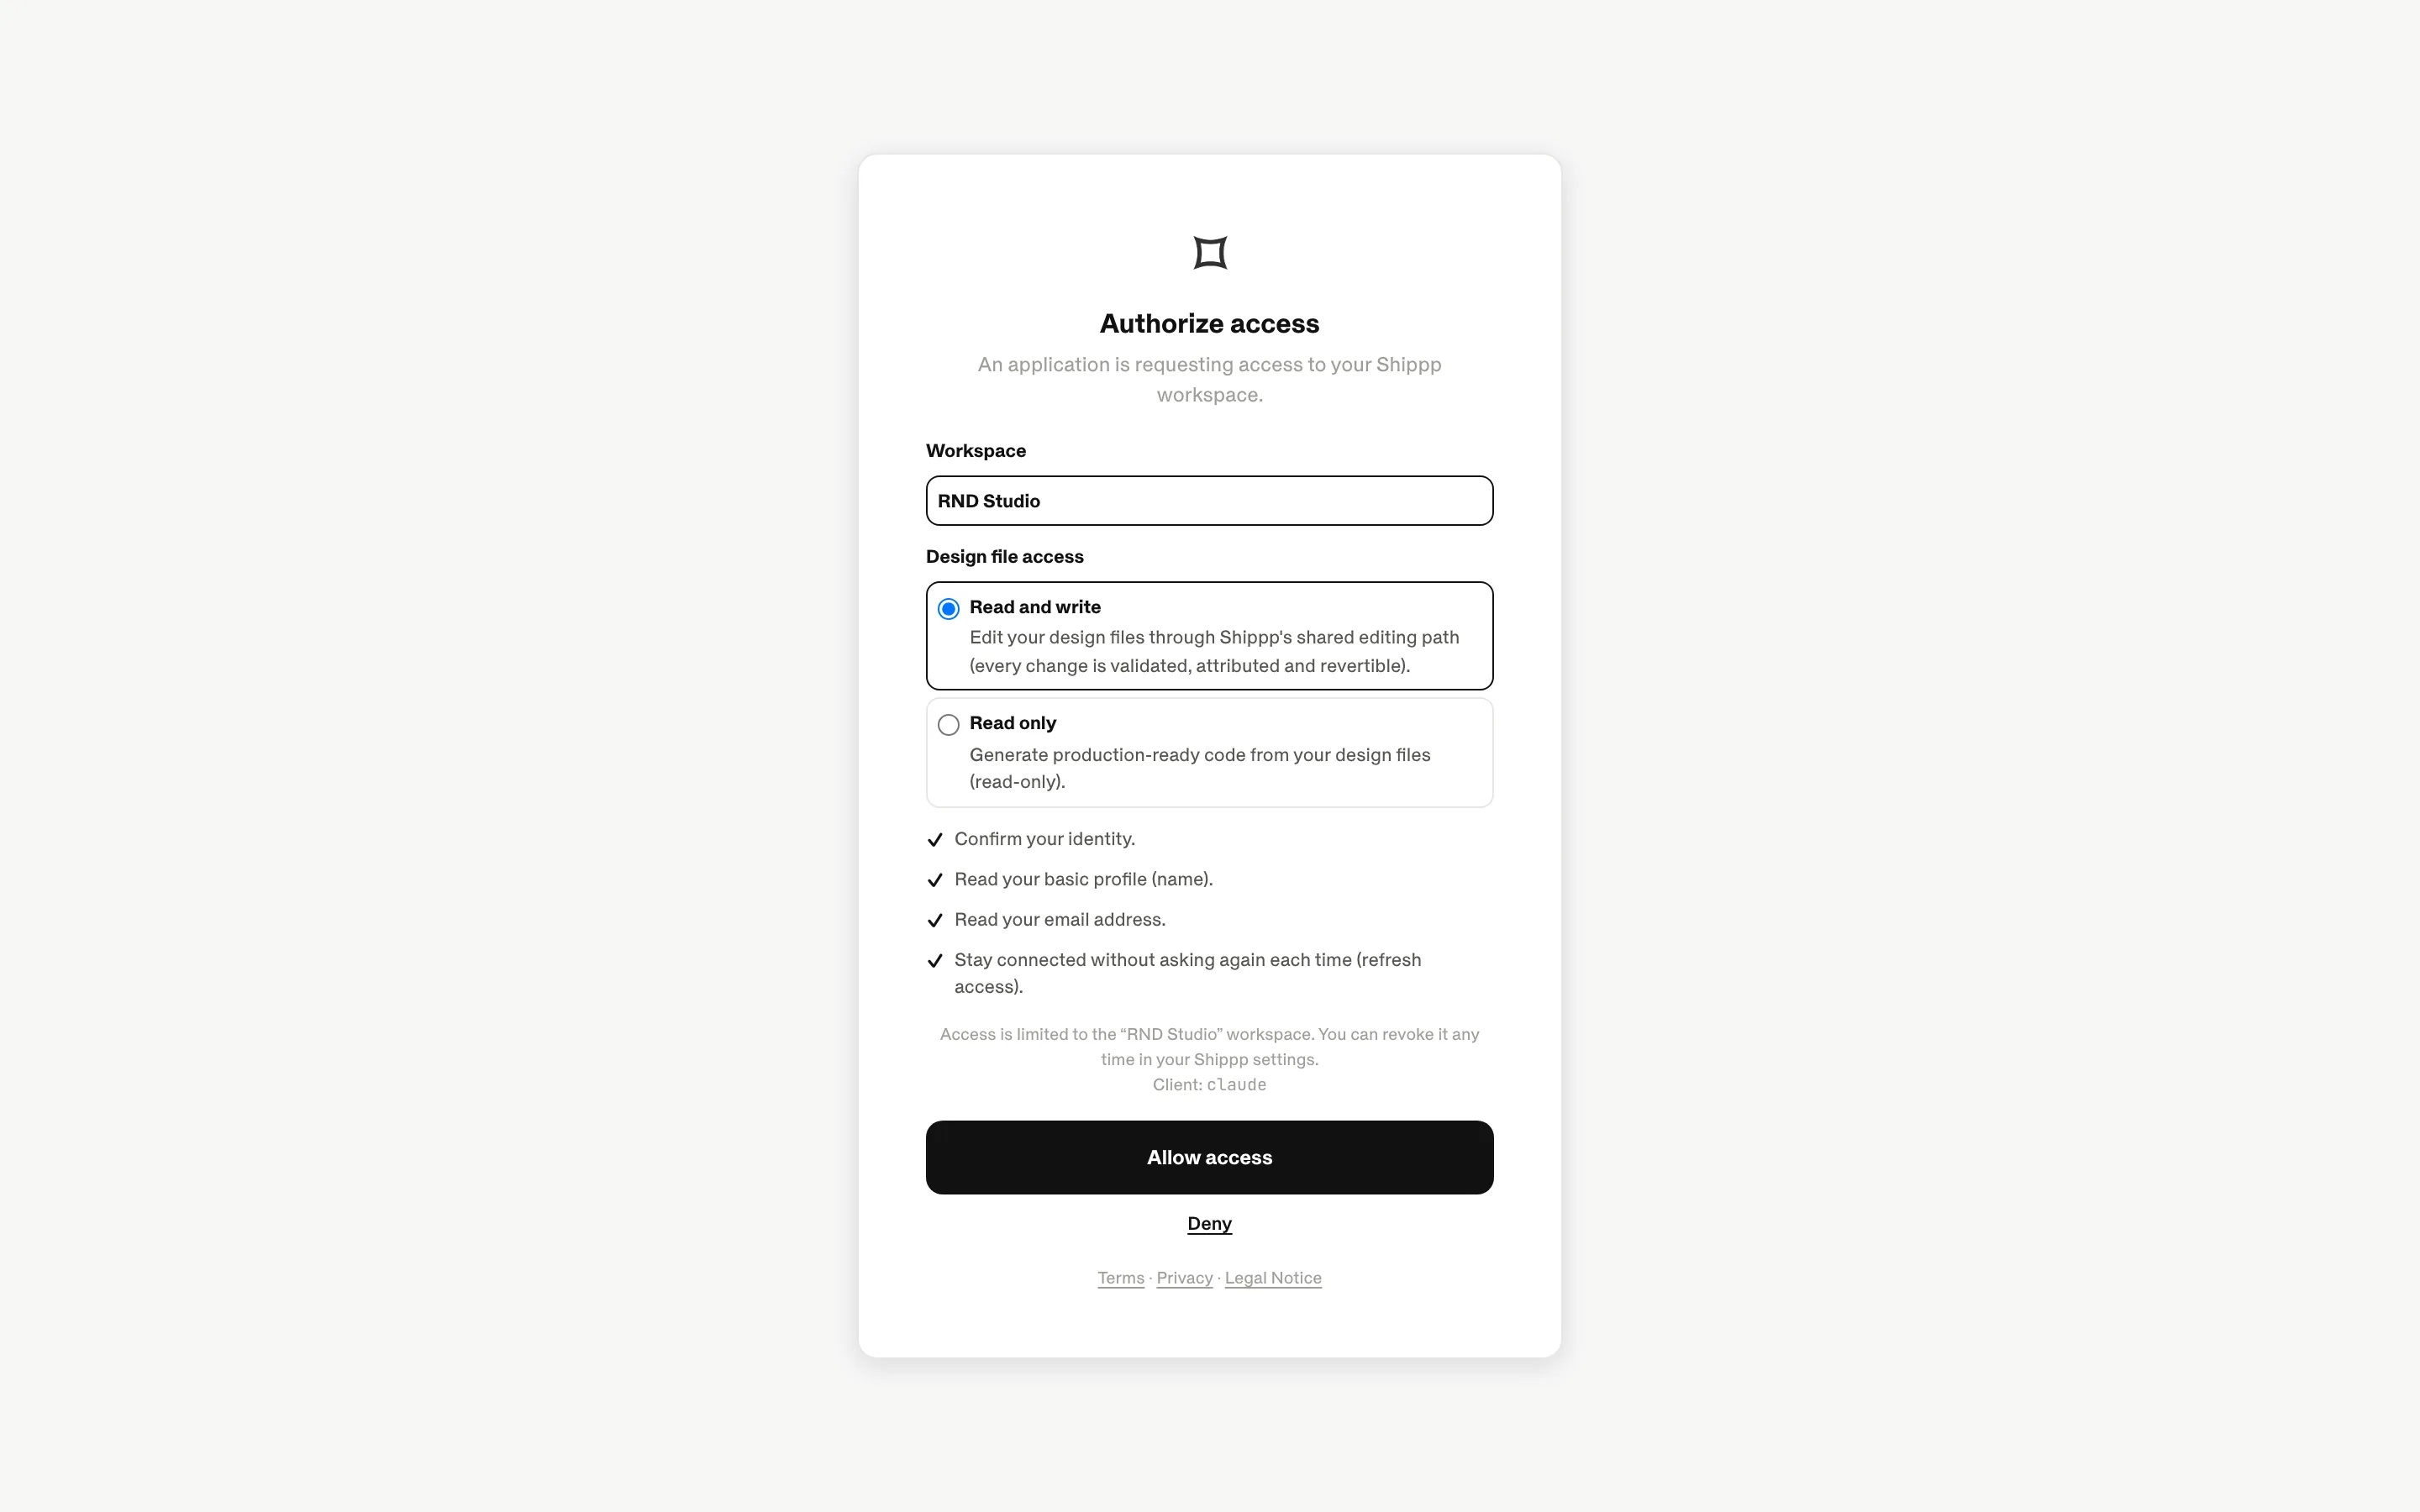
Read and write — edit your design files through Shippp's shared editing path; every change is validated, attributed and revertible. Read only — generate production-ready code from your design files.
Check that it works
Open the file you want to work on in Shippp, select something, and ask your client:
Prompt
Use Shippp: what do I have selected, and which screens and components does this file have?The client should list your screens and describe your selection. In Shippp, the MCP button in the right panel shows your client as Active or Working. Something wrong? See Troubleshooting.